INTRODUCTION
Ginger crunch is another one of those classic slices that you’re going to find in almost every Kiwi bakery or café. It’s normally formed with a shortbread base and then topped with ginger icing. However, over the years, the traditional recipe has been spruced up by many bakers by including add-ins like crystallized ginger, roasted pistachios, and citrus fruits. The addition of oats into the base is also a common addition. This is my interpretation of the ginger slice that I have each time I visit my mum at Bennett Café in Mangawhai.
QUALITY INGREDIENTS
▪️Flour – Use all-purpose flour as the base of the ginger crunch. For accuracy, scale it off on a digital scale.
▪️Butter – I always use unsalted butter in my bakes to have full control over the saltiness. Make sure to bring it to room temperature for easy creaming.
▪️Ginger (grounded) – This spice adds warmth and a little kick to the slice base and the icing. I love the taste and flavor of ginger, so I suggest being a little more heavy-handed with your measurements regarding ginger portions.
▪️Baking Soda – Baking soda will help give the base a slight rise and a crisp texture.
▪️Sugar – Utilize granulated sugar for the shortbread base to achieve a tender crumb.
▪️Powdered sugar—Use powdered sugar for the icing. Sieve older powdered sugar to eliminate any clumps that have built up over time.
▪️Golden syrup—Add the golden syrup to the icing to act as a bonding agent for the powdered sugar, ginger, and butter and to give off caramelized sugar aromas.
▪️Roasted Pistachios – Roast the pistachios at 350°F for six minutes to enhance their flavor. Keep a close eye on them when they smell nutty to avoid overbaking.
EQUIPMENT AND PREP OVEN
▪️ Choosing the Right Pan is a crucial step in your baking journey. I always use a light aluminum (small) loaf pan, renowned for its even baking, to ensure a perfect slice. I like to use my Fat Daddio mini bread loaf pan or my 8×4 Loaf pan from USA Pans, which cuts 8 slices.
▪️Prep the tin—It’s best to prep your slice/ tin in advance. Line the tin with two pieces of parchment paper so no metal is exposed. Ensure that your parchment pieces have a little overhang so they can be clipped down to secure the paper to the tin. Use the overhang to easily remove the slice once it cools after baking.
▪️ Digital scale –The key to precision in baking is a digital scale. This tool can transform your baking, guaranteeing the most accurate results. I personally rely on mine, using it to measure almost all of my ingredients. You can easily find one at your local supermarket or online stores like Target or Amazon for around $20 USD, a small investment that will pay off in the quality of your bakes.
▪️ Spoon & Fork – Spoon: to help even out the surface of your slice – before and after baking. Fork: to dock holes into the slice to allow the base to bake evenly throughout the pan.
▪️Oven prep – Place a rack in the middle of the oven to ensure your slice bakes evenly. Preheat the oven to 375F. An oven thermometer is necessary to ensure your oven is heating accurately. Apart from the kitchen scale, it’s probably the best money you can spend on general baking. Home ovens are off by 15°, sometimes 25°, and even more.
▪️Oven Rack Placement—For the most even bake, position your oven rack in the middle of the oven. If you’re familiar with any hot spots in your oven, adjust the rack to avoid overbaking and over-browning your slice.
▪️Wire Cooling Rack – Investing in a wire cooling rack is another kitchen tool I highly recommend. Having a wire rack will decrease the cooling time of your muffins, save you from soggy bottoms, and reduce the stress of finding a place to set your piping hot slice tray/loaf pan straight out of the oven.
 PRO TIP/ KITCHEN HACK
Docking your base with a fork: Use your fork to create horizontal lines across your base. Docking allows heat to bake the edges and center of your slice evenly for a more consistent texture.
![]()
METHOD
1. Preheat your oven to 350F and line a sheet tray with parchment paper or foil. Scatter your pistachios evenly across the tray and place in the oven to bake for 6 minutes. After a few minutes, you should begin to smell a nutty aroma, but be careful not to burn them!
2. Bump the oven temperature to 375 and allow it to rise to the accurate temperature to bake the base. The dough for the base should only take 10 minutes to come together.
3. In a separate bowl, mix the flour, baking soda, and ginger powder, whisk it all together, and then set it aside.
4. In another mixing bowl, you will mix the butter and sugar. It is light, airy, fluffy, and lighter in several shades. Then, you’re going to add flour to your butter. I like to toss it around with either a fork or spatula – I try to avoid using my hands because of the extra heat that will give off. Either inside the bowl or on a clean bench space, start kneading with medium-hard pressure until you get a solid, compact ball of dough, 3-4 minutes.
5. Line your loaf tin with parchment paper, break up the dough, and sprinkle it over the bottom of the pan until it is evenly distributed. Then, push down the dough with either the back of the measuring cup, your hands, or the back of the spoon.
6. I like to finish by smoothing the base with the back of the spoon and pushing down on the edges of the pan, as the sides tend to rise more as the base bakes.
7. Next, you will dock the base. To do this, we’ll use a fork and poke horizontal lines along the base. This will help allow the base to cook evenly by letting heat penetrate at different points.
8. Place the slice base at 375°F for 22 to 25 minutes until the top is golden brown and the sides slightly pull away from the pan’s edge.
9 In the last 10 minutes of baking at your ginger crunch base, you will want to start your ginger icing. Sieve your powdered sugar and ginger powder. In a heavy-bottom pan on low-medium heat, melt butter and golden syrup, then quickly add your sugar and ginger (you do not want your butter to split). Allow the powdered sugar to absorb the liquid and thicken into icing. Make sure that there are no clumps of powder left in your icing, and attempt to whisk out bubbles.
10. When you take your base out of the oven, you’ll want to set it down on a wire rack. With the back of the spoon you used earlier, press down on the edges of the base that have risen until they touch the sides of the tin again. Your base surface should be level with no gaps on the side.
11. Once the base surface is flat, pour the ginger crunch icing on top. Because it’s still hot enough, it should run onto the base pretty smoothly; otherwise, use a spatula, toothpick, or knife to smooth out the surface. Now, it’s time to add any toppings you want on your ginger crunch, such as pistachios or crystallized ginger.
12. If you have decided to use pistachios, think about where you will cut into your slice and sprinkle a few of the smaller pieces where the slice lines will be cut. It’s going to be a lot easier when you’re entering the knife into the icing and pushing it down. Using smaller pieces will limit any indentations from the nuts and the sides when they’re open and exposed.
13. Leave your ginger crunch out at room temperature, or if you are in a rush, you can put it in the fridge (once it is at room temperature) for half of the chilling time—which is two hours. Just make sure that you cut into the ginger crunch when it’s not completely rockhard solid, and make sure that you also use a clean, sharp knife!
Storing Ginger Crunch Slice
Keeping it fresh –These ginger crunch slices will last 3-4 days at room temperature if tightly wrapped with clingwrap and kept inside an airtight container. If it is summer or you are in a hotter climate, you can keep them wrapped and in an airtight container in the fridge.
Freezing – You can easily freeze your slice by wrapping it in clingwrap and storing it in an air-tight container or freezer bag. When you are ready to enjoy a slice, thaw it in the fridge before leaving it at room temperature.
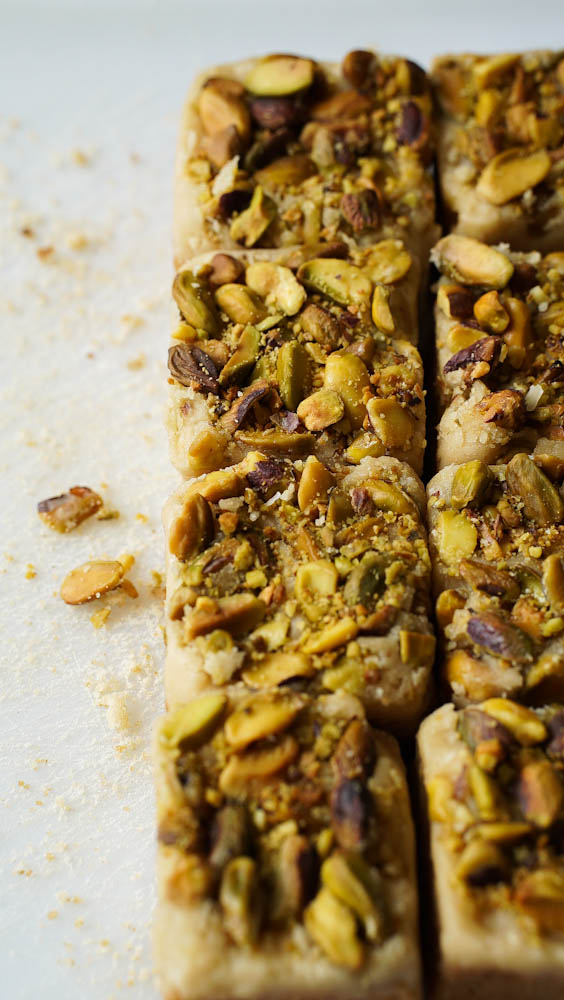
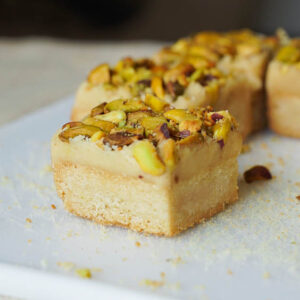
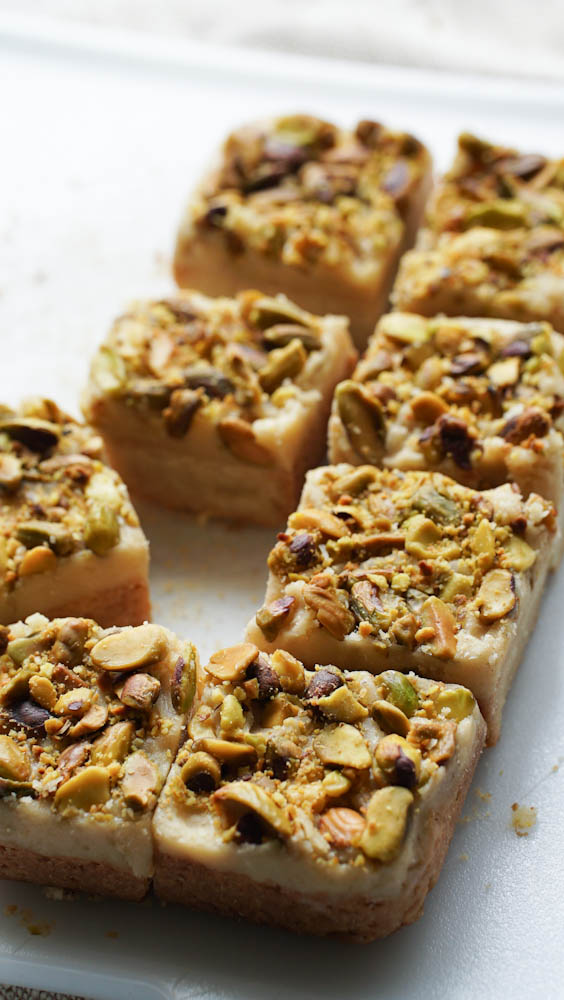
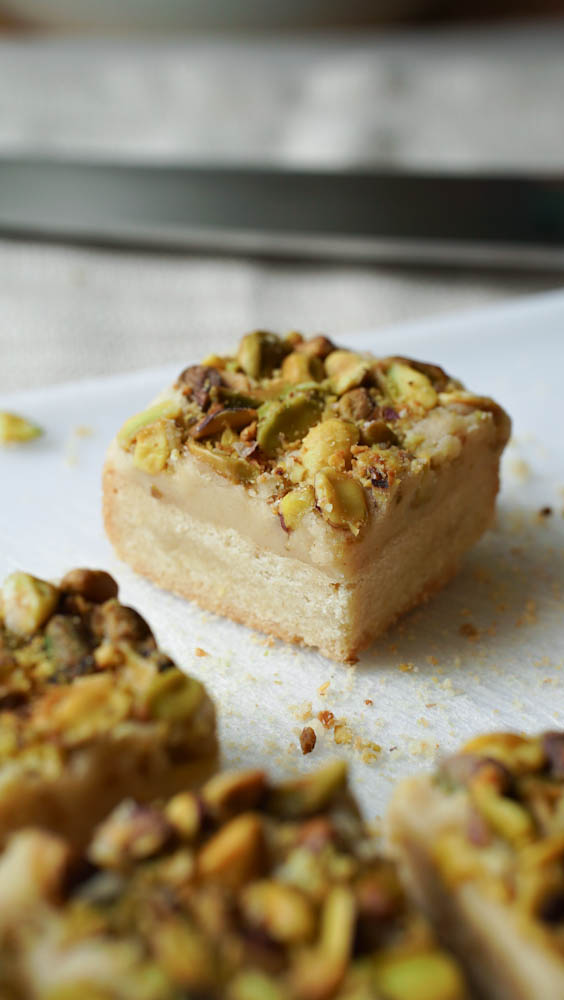
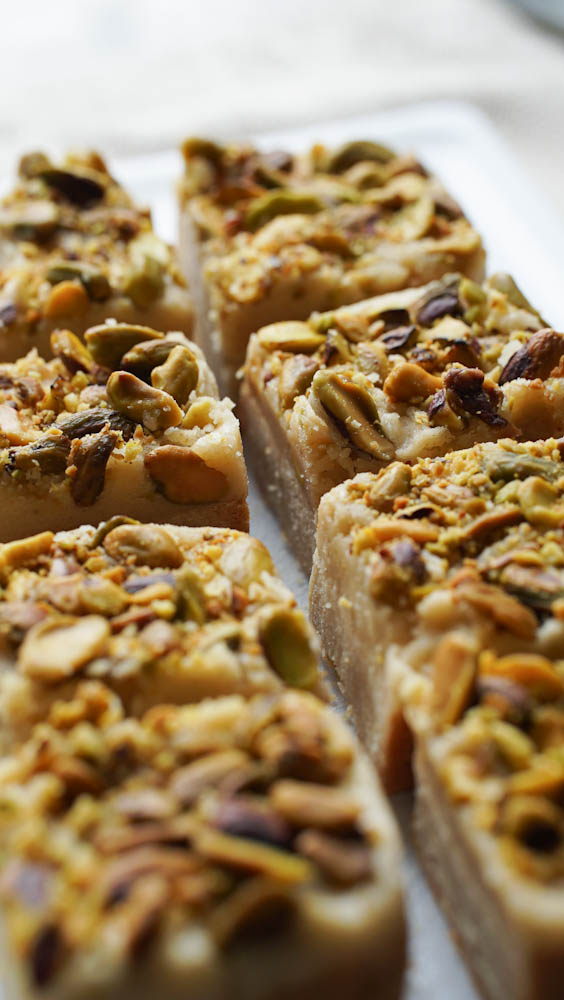
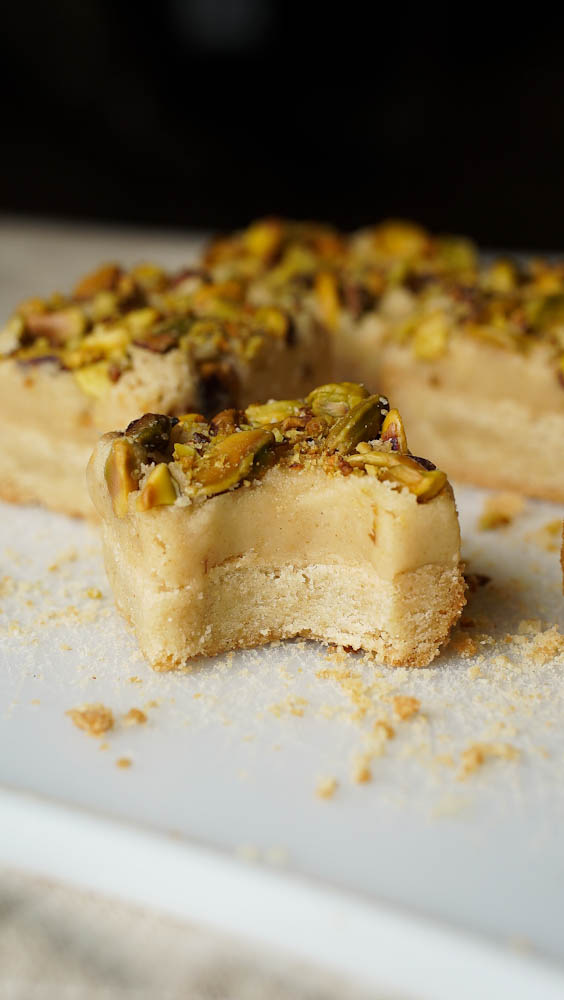
Ginger Crunch
This classic New Zealand Ginger Crunch is topped with a kick of ginger icing and finished with a generous layer of roasted pistachios.
Equipment
- large mixing bowl
- digital scale
- measuring spoons tsp / tbsp
- loaf tin 8×4 or 9×5
- fork
- spoon
- balloon whisk
- soft rubber spatula
- baking paper
Ingredients
Base
- 125 g all-purpose
- 85 g unsalted butter room temp
- 66 g granulated sugar
- ¼ tsp baking soda
- 1½ tsp ground ginger
Icing
- 105 g powdered sugar
- 75 g unsalted butter
- 2 tbsp golden syrup
- 1 tbsp ground ginger
Instructions
Roasted Pistachios
- Line a sheet tray with parchment paper and preheat the oven to 350℉. Scatter pistachios on the tray and roast them in the oven for 6 minutes or until you smell a nutty aroma. Be careful not to burn them!
Base
- Bump up the oven temperature to 375 and allow it to rise to the accurate temperature to bake the base. The dough for the base should only take 10 minutes to come all together.
- In a separate bowl, you’re gonna want to mix your flour, baking soda, and ginger powder whisk it all together, and then set it aside.
- In another mixing bowl, you’re going to mix the butter and sugar. It is light and air and fluffy and lighter by a couple of shades, then you’re going to add flour to your butter and I like to toss it around with either a fork or spatula. Either inside the bowl, or on a clean bench space, use your hands to kneading with medium-hard pressure until you get a solid, compact ball of dough, 3-4 minutes.
- Line your loaf tin with parchment paper. Begin to break up the dough and sprinkle it over the bottom of the pan until it is evenly distributed. Then start to push down the dough – with either the back of the measuring cup, your hands, or with the back of the spoon.
- Finish off by smoothing the base with the back of the spoon (or measuring cup), firmly pushing down on the edges of the base as the sides tend to rise more as the base bakes.
- Next, you will dock the base. To to do this, we’re going to use a fork and poke horizontal lines along the base. This is gonna help allow the base to cook evenly by letting heat penetrate through the different holes made by the fork.
- Place the base of the oven that is at 375°F for 22 to 25 minutes until the top is golden brown and the sides are slightly pulling away from the edge of the pan. Use the back of the spoon used earlier to push any raised sides of your base.
Icing
- In the last 10 minutes of baking at your ginger crunch base, you’re going to want to start your ginger icing. Sieve your powdered sugar and your ginger powder. In a heavy bottom pan on a low-medium heat, begin to melt butter and golden syrup, then quickly add your sugar and ginger (you do not want your butter to split). Allow the powdered sugar to absorb the liquid and start to thicken up into an icing. Make sure that there are no clumps of powder left in your icing and attempt to whisk out bubbles.
- When you take your base out of the oven, you’re going to want to set it down on a wire rack. With the back of the spoon you used earlier, press down on the edges of the base that have risen until they are touching the sides of the tin again. Your base surface should be level with no gaps on the side.
- Once the base surface is flat, pour the ginger crunch icing on top. Because it’s still hot enough, it should run onto the base pretty smoothly, otherwise use a spatula, toothpick, or knife to smooth out the surface. Now it’s the time to add any toppings that you want on your ginger crunch such as pistachios or crystallized ginger.
- Leave your ginger crunch out at room temperature or if you are in a rush you can put the ginger crunch in the fridge (once it is at room temperature) for half of the chilling time – which is two hours. Just make sure that you cut into the ginger crunch when it’s not completely rockhard solid, and make sure that you also use a clean sharp knife!
Tried this recipe? Tag us @Gooddaytobake on instagramLet us know how it was!