Ingredients for Peanut Butter Cookies
▪️Peanut butter – creamy or chunky, it’s your call! I would recommend staying away from natural peanut butter.
▪️Flour – Just your regular all-purpose flour will do here
▪️Egg – In a small bowl break an egg and lightly beat it together. Divide the egg in half with either a scale: measuring out 25g or with a measuring spoon: two tablespoons. You can freeze the remaining egg mixture in an ice cube tray transfer it to a freezer bag and store it for up to 2 months.
▪️Butter – Unsalted is always the way to go, this will allow you to have full control over the salt levels in your bake. However, if you only have salted then either reduce or omit the added salt in the recipe.
▪️Vanilla – It makes such a difference to use a good quality vanilla extract in your bakes. I always use vanilla extract or a vanilla paste rather than an artificial essence. Trust me, it might be a few dollars more but definitely worth it 100%.
▪️Salt – Fine sea salt is a recurring ingredient in most of my recipes. You can substitute for other salts – just keep in mind that another brand/type of salt will have a different level of saltiness, so adjust your salt amount accordingly.
▪️Baking Soda/Powder – Baking soda will help the cookies to spread and create crispy edges. The baking powder will help the cookies rise and gain a little height.

PRO TIP/ KITCHEN HACK
Utilizing a convection oven: it is prudent to make a conscious adjustment by reducing the oven temperature by 25°F, accompanied by a corresponding reduction in baking time, as convection ovens tend to hasten the baking process.
How to make Peanut Butter Cookies
1. Dry ingredients – Start by preparing the dry ingredients. Add the flour, baking soda, baking powder, and salt to a small bowl and whisk them together. Set this mixture aside for later.
2. Cream together the butter and sugar – Cream the sugar and room-temperature butter in a large bowl. Beat the mixture for 2-3 minutes until it becomes a few shades lighter and develops a fluffy texture.
3. Add the peanut butter – Add the peanut butter to the butter and sugar mixture and continue to beat for another minute.
4. Add the egg and vanilla – Once the peanut butter is fully incorporated, add the egg and vanilla. Beat the mixture until all ingredients are thoroughly combined.
5. Sieve the dry ingredients into the wet – Sieve the dry ingredients into the wet mixture and fold them together using a rubber spatula until the last streak of flour has disappeared.
6. Rest the dough – Allow the dough to rest for at least 15 minutes to create a firmer dough. After resting, use a cookie scoop to divide the dough evenly and roll it into balls.
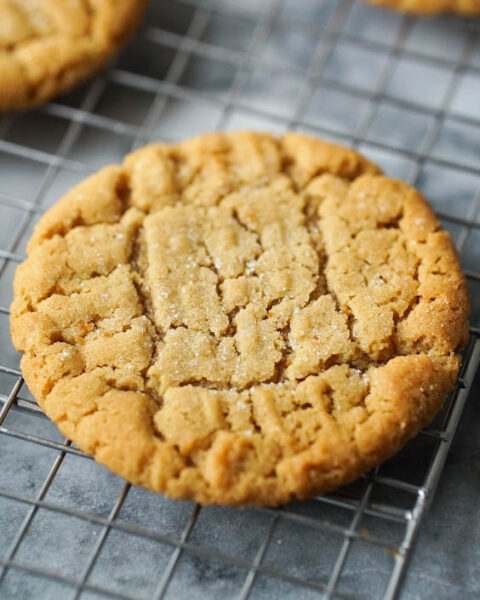
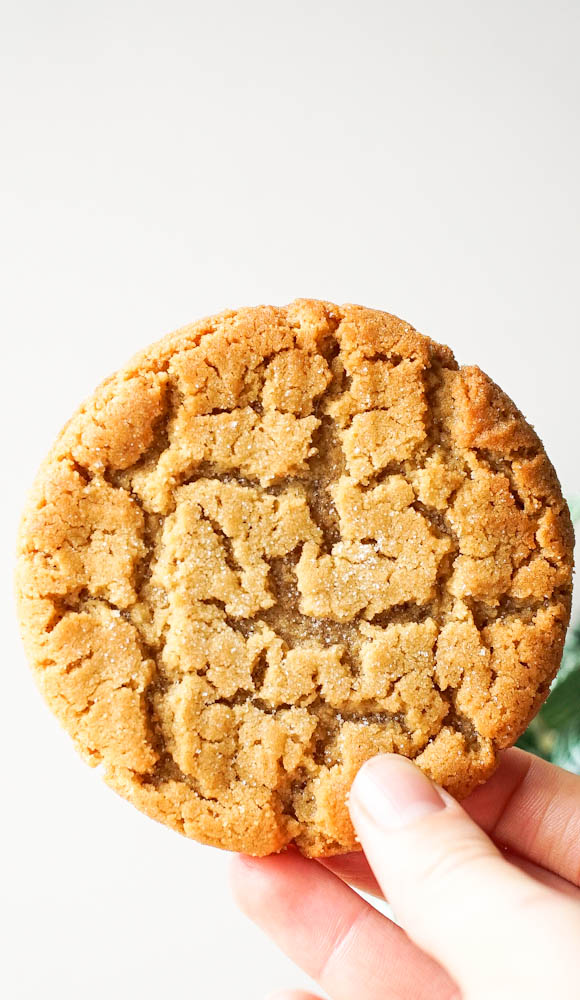
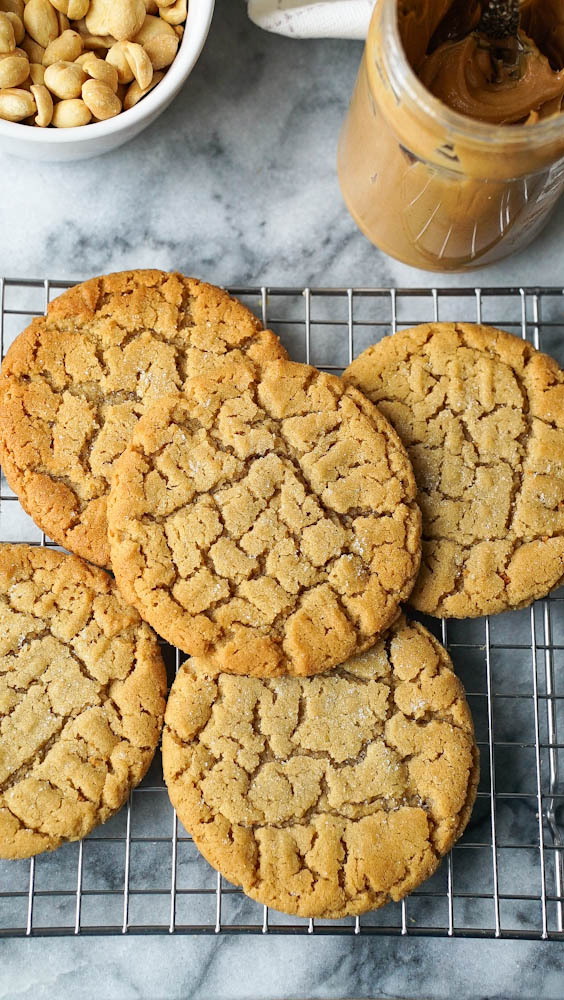
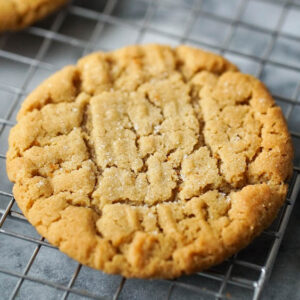
7. Use a fork – Use a fork to press down on the cookie vertically and horizontally, resembling a cross.
8. Sprinkle sugar and bake – For an extra special touch, sprinkle granulated sugar over the cookies before baking.
9. Bake time – Bake the cookies for 9-11 minutes, but keep an eye on them, as all ovens are different. The outer edge of the cookie should start to get a nice golden color. Be careful not to overbake these cookies.
10. Cooling time – Allow the cookies to cool on the tray for 5 minutes before transferring them to a wire cooling rack.
Storing Peanut Butter Cookies
Baked Cookies – In general code cookies can be stored in an airtight container at room temperature for 3 to 5 days depending on the recipe cookie cutter recipes tend to keep longer to keep the cookies soft add an apple wedge tortilla or a piece of bread to the container to reheat them placed an oven heated to 350 Fahrenheit for 3 to 5 minutes or until warmed through I prefer to refrigerate or freeze my Joe and bake cookies as I want them because nothing beats fresh still warm cookies.
Cookie Dough – can be stored in the fridge covered for up to three days let’s set a room temperature until warm enough to scoop both of cookie dough can also be placed on a cookie sheet and frozen ones frozen transfer the balls to an airtight container and store in the freezer for up to six weeks back from frozen dropping the oven temperature by 25 Fahrenheit and adding an additional few minutes to the cooking time or bring the Joe to defrost at room temperature and baked as directed by the recipe.
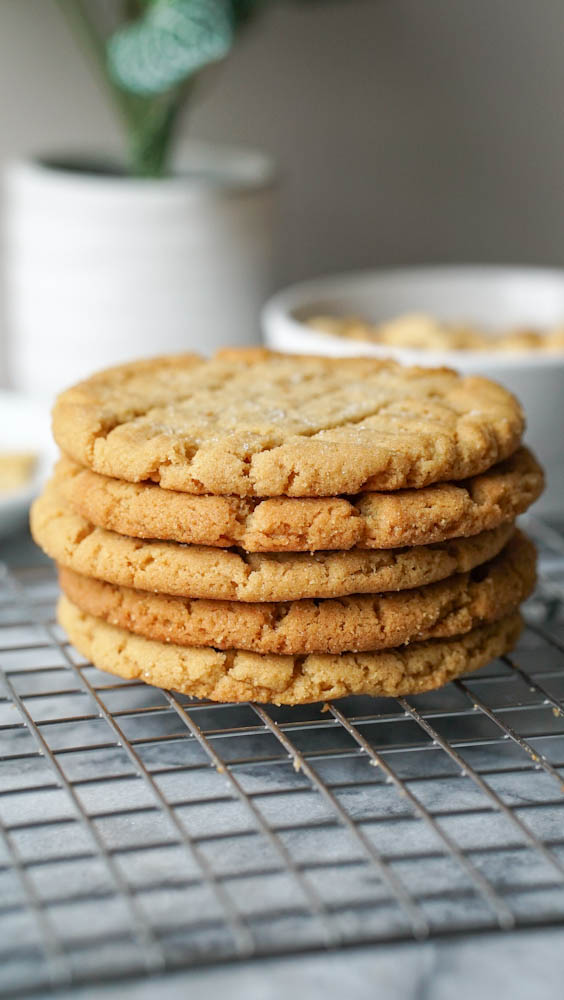
Peanut Butter Cookies
Perfectly balanced peanut butter cookies, soft and chewy with crispy edges, are topped with sugar for extra crunch. They're easy and irresistible!
Equipment
- digital scale
- large mixing bowl
- measuring spoons
- balloon whisk
- soft rubber spatula
- large cookie scoop
- baking paper
- sheet pan
- oven thermometer
- wire rack
Ingredients
- 70 g flour
- 56 g unsalted butter room temp
- 2 tbsp egg 1/2 egg – whisked together
- 75 g brown sugar
- 25 g granulated sugar + a tbsp for sprinkling
- ¼ cup peanut butter
- ⅓ tsp baking soda
- ¼ tsp baking powder
- ¼ tsp salt fine sea salt
- ½ tsp vanilla extract or paste
Instructions
- Line a sheet tray with parchment paper and preheat the oven to 375℉
- In a small bowl, add the flour, baking soda, baking powder, and salt and whisk, then set aside for later.
- In a large bowl, add the sugar and room-temperature butter and beat for 2-3 minutes until a few shades lighter and a fluffy texture.
- Scoop in the peanut butter and continue to beat for another minute.
- Once the peanut butter is fully incorporated into the other ingredients add the egg and vanilla and continue to beat until all ingredients are fully combined.
- Add the dry ingredients and fold with a rubber spatula until the last streak of flour has disappeared.
- Allow the dough to rest for at least 15 minutes so that the flour can absorb the liquid and create a firmer dough. After the dough has rested, use a cookie scoop to evenly divide the dough and roll it into balls in the palm of your hands.
- With a fork, press down onto the cookie both vertically and horizontally across the cookie – resembling a cross.
- Sprinkle sugar and bake – (optional) If you would like to give your cookies an extra special touch, sprinkle granulated sugar over the top of the cookies – and then bake!
- Bake the cookies for 9-11 minutes. All ovens are different, I would first check the cookies at the 9-minute mark and keep them in the oven if they need a few more minutes. The outer edge of the cookie should start to get a nice golden color. Be careful not to over-bake these peanut butter cookies as they can turn from baked to overdone quite quickly.
- Allow the cookies to cool on the tray for 5 minutes before transferring them to a wire cooling rack.
Tried this recipe? Tag us @Gooddaytobake on instagramLet us know how it was!