Equipment and Oven Prep
▪️ Digital scale –The power of precision in your baking with a digital scale can make a world of difference in the end result. I rely on mine to measure almost all of my ingredients, ensuring the most accurate results. You can easily and affordably purchase one from a supermarket or store like Target or Amazon for around $20 USD.
▪️Oven Temp – When baking your cookies (after chilling), preheat your oven to 375°F at least 20 minutes before baking. An oven thermometer is necessary to make sure your oven is heating accurately. Apart from the kitchen scale, it’s probably the best money you can spend on general baking. Home ovens are off by 15°, sometimes 25°, and even more.
▪️Oven Rack Placement – For the most even bake, position your oven rack in the middle of the oven. If you’re familiar with any hot spots in your oven, adjust the rack accordingly to avoid underbaked or overbaked cookies in that batch. This simple yet effective step can significantly enhance the quality of your cookies.
▪️Parchment paper – Cut out a piece of parchment paper that is the size of the 1/2 sheet tray. This will ensure that your cookies don’t stick to the tray, making clean-up a breeze and preserving the shape of your cookies.
▪️ Cookie Scoop – Using a scoop or a digital scale to measure your divided dough evenly is always helpful in providing even baked batches of cookies.
▪️Wire Cooling Rack – Investing in a wire cooling rack is another kitchen tool I highly recommend. Having a wire rack will decrease the cooling time of your bakes, save you from soggy bottoms, and reduce the stress of finding a place to set your piping hot trays and pans straight out of the oven.

PRO TIP/ KITCHEN HACK
Utilizing a convection oven: it is prudent to make a conscious adjustment by reducing the oven temperature by 25°F, accompanied by a corresponding reduction in baking time, as convection ovens tend to hasten the baking process.

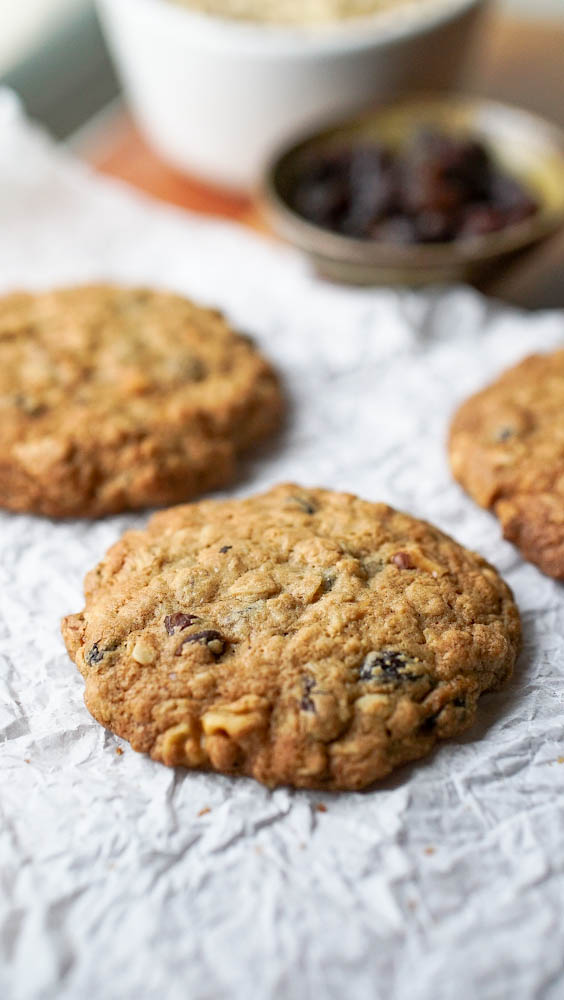
Oatmeal Raisin Cookies
Oatmeal cookies are a classic favorite. They are chewy, with a hint of crispness and a warm touch of cinnamon. They can be customized with raisins, chocolate chips, and walnuts.
Equipment
- digital scale
- large mixing bowl
- medium mixing bowl
- measuring spoons tsp/tbsp
- sieve
- electric mixer
- balloon whisk
- soft rubber spatula
- large cookie scoop
- baking paper
- sheet pan
- oven thermometer
- wire rack
Ingredients
- 125 g all-purpose flour
- 1 whole egg room temp
- 150 g brown sugar
- 113 g unsalted butter melted and cooled
- 2 tsp vanilla extract or paste
- 1/4 tsp sea salt fine
- 1/2 tsp baking soda
- 1/2 tsp baking powder
- 1/2 tsp cinnamon ground
- 1 ½ cup rolled old fashion oats avoid using quick oats
- ½ cup raisins
- ½ cup roasted walnuts optional
Instructions
- Preheat your oven to 350°F and line a sheet tray with parchment paper. Break the walnuts into small pieces and spread them evenly on the lined sheet tray. Roast the walnuts for about 7 minutes, until you start to smell a nutty aroma. Be sure to check on them frequently to avoid burning.
- In a large bowl, combine the sugar and melted butter. Use an electric mixer or a strong hand to beat the mixture for about a minute. This helps to fully incorporate the sugar into the butter, creating a smooth, consistent base for your dough.
- Mix in the egg and vanilla extract, continuing to beat until all the ingredients are thoroughly combined. This step ensures that the egg is evenly distributed throughout the mixture, which helps with the overall structure and flavor of the cookies.
- Sift the dry ingredients into the wet mixture, then fold them in with a rubber spatula. Only about half of the flour should be absorbed into the dough at this stage. This initial folding helps to incorporate the dry ingredients without overworking the dough.
- Add the rolled oats, raisins, and roasted walnuts to the dough. Continue to fold with the rubber spatula until the last streak of flour disappears. This ensures an even distribution of the oats, raisins, and nuts throughout the cookie dough.
- Preheat the oven to 375 and place a rack in the middle.
- Let the dough rest for at least 30 minutes. This resting period allows the oats to absorb the liquid evenly, preventing the cookies from spreading too much during baking. Not resting the dough can result in cookies that are too thin and spread out.
- After the dough has rested, use a cookie scoop to divide it into even portions. Roll each portion into a ball with your hands, then gently press down to form thick patties. Place these patties on a lined sheet tray, ensuring they are evenly spaced.
- Bake the cookies for 8-10 minutes. Look for a golden brown color around the edges of the cookies. Gently touch the center; if it feels set and springs back slightly, the cookies are likely done. This balance ensures a crispy edge with a chewy center.
- Remove the cookies from the sheet tray as soon as they are firm enough to transfer. Place them on wire racks to cool completely. This prevents the cookies from continuing to cook on the hot tray and keeps them crisp. Once cooled, store the cookies in an airtight container for the best texture.
Tried this recipe? Tag us @Gooddaytobake on instagramLet us know how it was!
Recipe Here